Showing posts with label myphone. Show all posts

Friday, May 17, 2013

How to Root MyPhone TS1 Duo

As I was passing by in some forums, I saw a thread on how to root MyPhone TS1 Duo. Rooting is always a dilemma when users buy the android products of our local mobile manufacturers because there were very little to no support for it unless there was a popular international counter part. But this time, a well-known method worked. So, the cheap android phone from MyPhone worth Php3,999 can now be rooted. Cool, right?
myphone ts1 duo
For the benefit of others who’s not aware, here’s the MyPhone TS1 specs:
  • Dual-SIM Touch Android Phone
  • 3.2″ 320×480 pixels TFT HVGA Resistive Touch Screen
  • Android 2.2 Froyo
  • Wi-fi, Wi-Fi hotspot
  • 2 MP Camera 1600×1200 pixels
  • Motion/Magnetic Sensor
  • MP3/MP4 Player/ Stereo FM Radio
  • Bluetooth/USB/3.5mm jack
  • GSM/EDGE Triband
  • Expandable Memory up to 8GB
Now, let’s proceed to the real thing- the process on how to root MyPhone TS1 Duo. This rooting method is the same when I made the tutorial on how to root Cherry Mobile Nova with Android 2.1 Eclair OS. So, I’ll just quote the steps here with a few minor changes.
[important]
DISCLAIMER: ctriplejcomputers will not be responsible for any damage   that may possibly occur to your device in any part of the process although it is unlikely to happen if you’ll follow the instructions carefully. Root at your own risk.
[/important]
1. Make sure your battery level is above 80%. This is not required but I’m recommending it to lessen possible problems.
2. Download z4root. You can download it using your PC or phone it doesn’t matter just place it in your SD card.
3. Install the z4root app on your MyPhone.
4. Launch the app and click ROOT!
5. Wait for the whole process to finish.
6. Voila! You’ve successfully rooted your MyPhone TS1 Duo!

How to root MyPhone A888 Duo


(Image Source: Mon Barbeche of MyPhone A919 Android Users)
So you finally got your new MyPhone A919 Duo/MyPhone A888 Duo, but can you download any app you want? What about custom themes? Do you ever feel like altering or replacing system applications and settings on your new phone? Luckily, Mon Barbeche of MyPhone A919 Android Users found a way on how to root your phone. Here's how to root your MyPhone A919 Duo/MyPhone A888 Duo after the jump.
How to root your MyPhone A919 Duo/MyPhone A888 Duo
by Mon Barbeche of MyPhone A919 Android Users
 
ROOTING VOIDS YOUR PHONE’S WARRANTY. ROOT AT YOUR OWN RISK.
1. Download PDANET for Windows, here http://junefabrics.com/android/download.php
2. Follow the instructions on how to install PDANET and when asked on which phone are you using, choose “Other brands
Note: Don’t connect your phone on your computer yet!
3. In your phone, go to Settings > Developer Options > Check USB Debugging.
4. Wait for the installation of the phone’s drivers. It will prompt a message once it is finished.
5. It's time to root, but first download this file http://www.mediafire.com/?lwhknfmnc25nbc6
6. Unzip the file and double click on the “RUNME.BAT” file. The command prompt will appear and press "1" and hit ENTER.
7. Wait for the command prompt to say that you have to restore your phone. Go over your phone and hit “Restore my Data.” It will reboot and the command prompt will require you to press any key.
9. Then wait for your smartphone to turn on.
8. ENJOY! You now have successfully rooted your phone!
Source: Mon Barbeche of MyPhone A919 Android Users (Facebook)

How to Root Myphone Mypad2

I successfully rooted my MyPhone MyPad2 using the DooMLoRD_v1_Xperia-2011-ICS-ROOT-emu-busybox-su...

The DooMLoRD_v1_Xperia-2011-ICS-ROOT-emu-busybox-su should work for Tablets having A13 or SUN5i chipset (ARM Cortex™-A8 processor | ARMv7 Architecture) of which the MYPHONE MYPAD2 has (Check your MyPhone MyPad2 hardware using Antutu Benchmark app from Google Store).


Download DooMLoRD_v1_Xperia-2011-ICS-ROOT-emu-busybox-su here --->  http://www.androidfilehost.com/?fid=9390362690511176473

Guide:

- Temporarily disable antivirus, and any firewall you have to avoid conflict
- Make sure that no other ADB server is running in background (e.g. Flashtool, PCC, SEUS)
- Enable Unknown Sources in your tablet
- Enable USB Debugging Mode in your tablet
- Unrar/Unzip the DooMLoRD_v1_Xperia-2011-ICS-ROOT-emu-busybox-su.rar that you have downloaded
- Connect your tablet to your computer
- Open the "runme.bat" from the extracted folder of DDooMLoRD_v1_Xperia-2011-ICS-ROOT-emu-busybox-su
- Read and follow onscreen instructions
- The tablet will reboot till the script says its finish
- Check the App Menu if the SuperUser is already installed; If yes, then your MyPhone MyPad2 is already rooted!


CREDITS to king001001 and of-course to DooMLoRD from XDA for the guide and everything!


WARNING:  Rooting is dangerous and might brick your device thus I am NOT responsible for the outcome;  DO THIS ON YOUR OWN RISK!  Remember, I already warned you...
NOTE:  I am not a programmer/developer, I just found this workaround through deep research.

How To Root MyPhone A919i Duo

I’m sure there are tons of people who bought the new MyPhone A919i Duo. Now that you have your brand new Android phone, what should you do next? Some of you might definitely want to root your phone and install other useful apps and tools like Custom recovery.

root myphone a919i duo

How To Root MyPhone A919i Duo?

Before you proceed, let me just remind you that rooting your MyPhone A919i Duo is potentially dangerous and could permanently brick (damaged) your phone. Specially if you don’t know what you are doing. I won’t be responsible for any damages that will happen to your phone, and it is purely up to you if you want to try this or not.
I haven’t tried this since I do not have an A919i Duo, but according to Symbianize forum member, C0re, its working for him. You will need to download additional files and drivers. He said you might be needing Micromax A116 drivers, for phones that are using the same MTK6589 chipset. Below are the instructions on how to root your MyPhone A919i Duo:
1. Enable USB Debugging on the phone.
2. Download and unrar the file. Extract anywhere. Refer to the original thread here.
You might want to uninstall any currently installed A919i and ADB drivers before installing PDAnet, but this is optional only.
3. Install PDAnet, connecting the phone when prompted. (this is to install necessary drivers)
4. In the “motochopper” folder, execute “run.bat” (run as admin if needed).
5. The phone will automatically reboot. Done.
*You can uninstall PDAnet if you don’t need it.
*This will uninstall a very outdated version of SuperSU. Update SuperSU thru Play Store.

There you go, hope this would work on your MyPhone A919i Duo as well.
Credits to: Core of Symbianize and Mr. Vince Jorvina (member of facebook Myphone a919i duo group)

[ROOT] Guide For Rooting myPhone A818 THE SIMPLE WAY

The credit does not goes to me.
It goes to SuperGuko of symb.ph
You can say thanks to me anyways.

I AM NOT RESPONSIBLE IF YR BLASTS OR WHATEVER HAPPEN
YOUR WARANTY AND BRAIN IS NOW VOID.

What is Rooting and its benefits? —its like jailbreaking but its your Android phone, unlocking the capabilities of your Android device with the apps and tweaks that requires root access to the Android system. Its not necessary but if time came and you realized that you need to root your phone, then it must be it.
What is CWM recovery? – cwm is short for clock work mod recovery. All Android phones have recovery mode already but clock work mode is better and you can do more with CWM, like installing patches, updates, and tweaks on your device.

Rooting myPhone A818

SuperOneClick | Mirror: http://www.mediafire.com/?l291ej5damzoujk
Before you connect your A818 device on your PC, be sure to enable USB Debugging.

Then connect your device on your PC. Run the SuperOneClick app then click on the ROOT button that you can see.


Rooting MyPhone A818 using SuperOneClick


^you should be seeing something like that on your screen. Reports say that the rooting process only takes 30 seconds to 1 minute.

That’s it! Enjoy your rooted MyPhone A818!

Problems? Errors? Failed Root? Stucked?

Be sure you had disabled your anti-virus. Re-extract the SOC files to make sure there arent any deleted files that is vital on the rooting process.
Be sure you had installed the Google USB Drivers. You can seek help from Google if you are lost on this process. Well, its almost all common sense.
Be sure you had enable USB debugging.

Note: Guaranteed to work on devices with same info like these:

Baseband version:
MAUI.11AMD.W11.37.SP.V32, 2012/01/13
21:27

Kernel Version:
2.6.35.7
robinlaw@SW3Server #2
Thur Mar 1 20: 10: 12 HKT 2012

Build Number:
ALPS.GB.FDD2.MP.V4.5

Custom Build Version
PP_2G_PH.MYPHONE.A818_1.02.V11


TRY OTHER METHOD

Here’s another rooting method for MyPhone A818.

UnlockRoot 2.3 (LINK) http://www.mediafire.com/?8bauujqgat3poz6
Phone USB Driver (LINK) http://www.mediafire.com/?cii5vove7wxq749

STILL HAVING TROUBLE SEE THIS http://forum.xda-developers.com/show...1#post38365861

[ROOT] Guide For Rooting myPhone A818

The credit does not goes to me.
It goes to SuperGuko of symb.ph
You can say thanks to me anyways.

I AM NOT RESPONSIBLE IF YR BLASTS OR WHATEVER HAPPEN
YOUR WARANTY AND BRAIN IS NOW VOID.

What is Rooting and its benefits? —its like jailbreaking but its your Android phone, unlocking the capabilities of your Android device with the apps and tweaks that requires root access to the Android system. Its not necessary but if time came and you realized that you need to root your phone, then it must be it.
What is CWM recovery? – cwm is short for clock work mod recovery. All Android phones have recovery mode already but clock work mode is better and you can do more with CWM, like installing patches, updates, and tweaks on your device.

Rooting myPhone A818

First, you must download these files:

NOTE IF ANY DOWNLOAD IS HAVING ERROR THEN download it urself using google

SP Flash Tool — extract once downloaded. This is the app used for flashing an Android phone.

http://www.mediafire.com/?dridzg1tdokf2up

MT65x3 USB VCOM drivers –extract then install. We need these drivers so that the phone will be read by the SP Flash Tool once connected to the PC.

http://www.mediafire.com/?9wi60a5dtst2aw6


CWM based Recovery –this is the working CWM recovery (recovery.img) for the myPhone A818

http://www.mediafire.com/?jt482l02ls8kl4h

MT6573_Android_scatter.txt –we need this scatter text file.

http://www.mediafire.com/view/?tkizuj24vntmt9r

Root A818 –update file for rooting the A818.

http://www.mediafire.com/?kmbkj29lccsaili


Steps

Once the drivers are properly installed and the SP Flash Tool is already extracted and accessible, turn off your myPhone A818 and remove its battery.

Run SP Flash Tool.

Click the Scatter-loading button and navigate to the downloaded MT6573_Android_scatter.txt file.

Be sure that the RECOVERY is the only one selected, click on it and browse on the downloaded recoveryNonTouch.img file.

Click the Download button and just ignore the warnings.

Attach the battery again and connect the phone, be sure not to turn it on yet.

Wait for the process to complete. You will see a Green Circle with a label saying download okay. Normally, this process doesnt takes too much time and not more than 5 minutes as you were just writing a small-size recovery.img file.

How to enter into CWM recovery

Be sure that your phone is turned off.

Press Volume up + Volume down and power button until a set of choices appears then just press the up button to enter recovery.

With the CWM recovery, you can easily make a full back-up of your phone. This is as well called as Nandroid back-up. Just be sure you have enough storage on your SD card. Just select Select backup and restore, then choose back up and wait for it to finish.

How to root myPhone A818

Copy the RootA818.zip file on your SD card.
Enter CWM recovery.
Select install zip from sdcard, choose zip from sdcard, then locate RootA818.zip.
Select Reboot system now.
To know verify if the rooting process is a success, look for the SuperUser app in your drawer, or just check root access with the Root Checker app from the PlayStore.

Enjoy!
REFERENCE: http://www.symbianize.com/showthread.php?t=851383

STILL HAVING TROUBLE SEE THIS [urlhttp://forum.xda-developers.com/showthread.php?p=38365926#post38365926][/url]

How to Root myPhone A878 with working CWM


Credits to SuperGuko of symb.ph for the tutorial on rooting the myPhone A878. This one is somehow similar to the new method on how to root the myPhone A818. Please check out that as well, as I wont go much deep into specifics with this one, in case you are a bit lost. But I swear, this is a no sweat procedure.
Disclaimer: Root at your own risk. This method includes flashing. Whatever happens to your device is your full responsibility.
To start, you need to download these files:

Flashing CWM Process

The SP Flash Tool is easy to use, you can use this image below as a guide on how to work on it.
How to Flash CWM Recovery MyPhone A878
How to Flash CWM Recovery on MyPhone A878
  1. Install the drivers. (MT6577 USB VCOM)
  2. Remove the battery of your myPhone A878.
  3. Run the SP Flash Tool.
  4. Load the scatter.txt file by clicking the “Scatter-loading” button. (marked as step 1 on the above image)
  5. Load the recovery image by clicking on the word RECOVERY. (marked as step 2) Be sure that its only “RECOVERY” that is marked with check and shows the proper file address.
  6. Click the Download button, marked at step 3. Ignore all warnings.
  7. Then connect your phone via USB cable. Wait for the green circle saying OK to appear. This writing process wont take a long time.
After that, you can now unplug your device.

Going into recovery

myPhone A878 CWM recovery
To go into recovery, turn off your phone. Press and hold Volume up + power button together until options appear, then press the up button to enter recovery.

How to Root MyPhone A878

  1. Download this file Root_Superuser_3.1.3_Busybox_1.20.2-Update1-signed. It is an update file that will be installed via CWM recovery. Just copy it on the root directory of your SD card.
  2. Then Enter CWM recovery. Select install zip from sdcard >> choose zip from sdcard >> locate the downloaded and copied file.
  3. After the update installation completed, select Reboot system now.
myPhone A878 Root
myPhone A878 Root
To check if you had succeeded on rooting your myPhone A878, look for the SuperUser icon your app drawer or just install Root Checker app from the Play Store.
Enjoy!
Now with rooted myPhone A878, you can now uninstall unwanted/unnecessary apps aka bloatwares. Install patches and custom ROMs easily through recovery, improve internal memory usage and many more.
source

How to Root MyPhone A878 Duo

This tuts is originally came from symbianize, all credits goes to developers.
Steps

How To Root

1. Download Root_with_Restore_by_Bin4ry_v11.7z from here:

>>Root_with_Restore_by_Bin4ry_v11.7z<<

2. Extract the folder from the archive to any location in your harddrive using 7Zip.3. In your phone's menu, go to Settings--> Developer Options and tick on the checkbox beside USB Debugging and then connect the phone to PC with via USB cable. Windows will try to find the proper drivers from the internet.4. Open the folder you extracted and right-click on the file

RunMe.bat and click on "Run As Administrator". I'm not really sure if you need administrative privileges to run the batch file but I was just making sure. :-)

5. On the menu, there are two choices. Select "Normal".

6. Wait for a few seconds and on the phone, you'll be prompted with "Full Restore". Tick on "Restore My Data" and let the magic begin.

Drivers if needed : >>Drivers<<
Remember I will not take any responsibility on whatever may happen with your phone
________________________________________
For CWM (Clock Work Mod)

note: copied from super guko in symbianize

reference page http://www.symbianize.com/showthread.php?p=14015320#post14015320
download mobile uncle from google play >>>Mobile Uncle<<< and download >>recovery_port_A878.img 5.05mb<<

Ported CWM Recovery for MyPhone 0A878

1 Copy the downloaded recovery img from mediafire to the root of the phone internal memory

2 Must have the mobile uncle mtk tools from google play open it then

3 Select Update Recovery find the recovery_port_A878.img then click ok w8

4 check recovery it should have a cwm theme not the stock android ics recovery

5 if it shows stock rom again repeat till it is now cwm

6 enter recover then back up

take note

to enter recover hold volume up + power button then press vollume up for the recovery
_______________________________________________
for the switch of internal to external memory switches the internal to sd card

first of all download this MyphoneA878_disableinternal_sdcard.zip


>>MyphoneA878_disableinternal_sdcard.zip<<

put in the root of the phone internal memory

enter cwm then select install zip from sdcard choose zip from sdcard then locate the file then yes
NOW FOR THE DATA REPARTITION this will make the internal memory of your phone to be added on the phone memory not the ram it is the on that stores your apps making it 2.5 gb than 1gb

>> 01MyphoneA878_disableinternal_sdcard<<
put in the root of the phone internal memory enter cwm then select install zip from sdcard choose zip from sdcard then locate the file then yes >>02MyphoneA878_Data_Repartition.zip<<

copy on the root of the phone
Enter CWM then Select install zip from sdcard >> choose zip from sdcard >> Select mo na yung file >> Yes Select wipe data/factory reset >> Yes Select Reboot system now.

w8 for it to rebooot mga 10 min ung nag stuck tangalin battery

kung ayaw parin mag load punta lang cwm then wipe data factory lang then reboot hangang gumana wag mag alala d pa sira yang phone mo hahahah kinabahan rin ako
take note ren pag tapus mo na ang data partition sa settings po wag kayo factory sreset sa settings kasi mag forever reboot po ang myphone a878 nang yari sakin un pero some how na ayus naman hahah ingat lang po Para mabalik ung data repartition eto 1 download www.mediafire.com/?hiou356voko668s

at www.mediafire.com/?xbvg5xghwmmqgff

gawin nung pag kagawa sa repartition
copy on the root of the phone enter cwm then Select install zip from sdcard >> choose zip from sdcard >> Select mo na yung file >> Yes Select wipe data/factory reset >> Yes Select Reboot system now. Fix Update para sa Pinoy app. para gumana sa combined internal memory

Install mo lang sa CWM Recovery. then lagay mo sa SDcard pinoy contents >>Pinoy Apps<<
Custom Rom by : DJwayne

Custom ROM for A878: >>YONIP_MP_A878_V1.0MOD.zip << Logs:

*Deodexed ROM

*Pre-rooted *init.d support Pre-requisites: Dapat na apply muna lahat yung kay SuperGuko bago po install itong ROM Apply this via recovery. THANKS to SuperGuko

Rooting myPhone A818

First, you must download these files:
  • SP Flash Toolextract once downloaded. This is the app used for flashing an Android phone.
  • MT65x3 USB VCOM drivers –extract then install. We need these drivers so that the phone will be read by the SP Flash Tool once connected to the PC.
  • CWM based Recovery –this is the working CWM recovery (recovery.img) for the myPhone A818.
  • MT6573_Android_scatter.txt –we need this scatter text file.
  • Root A818 –update file for rooting the A818.

Steps

  1. myPhone A818 flashing guide via SP Flash Tool
  2. Once the drivers are properly installed and the SP Flash Tool is already extracted and accessible, turn off your myPhone A818 and remove its battery.
  3. Run SP Flash Tool.
  4. Click the Scatter-loading button and navigate to the downloaded MT6573_Android_scatter.txt file.
  5. Be sure that the RECOVERY is the only one selected, click on it and browse on the downloaded recoveryNonTouch.img file.
  6. Click the Download button and just ignore the warnings.
  7. Attach the battery again and connect the phone, be sure not to turn it on yet.
  8. Wait for the process to complete. You will see a Green Circle with a label saying download okay. Normally, this process doesnt takes too much time and not more than 5 minutes as you were just writing a small-size recovery.img file.

How to enter into CWM recovery

Be sure that your phone is turned off.
Press Volume up + Volume down and power button until a set of choices appears then just press the up button to enter recovery.
With the CWM recovery, you can easily make a full back-up of your phone. This is as well called as Nandroid back-up. Just be sure you have enough storage on your SD card. Just select Select backup and restore, then choose back up and wait for it to finish.

How to root myPhone A818

  1. Copy the RootA818.zip file on your SD card.
  2. Enter CWM recovery.
  3. Select install zip from sdcard, choose zip from sdcard, then locate RootA818.zip.
  4. Select Reboot system now.
To know verify if the rooting process is a success, look for the SuperUser app in your drawer, or just check root access with the Root Checker app from the PlayStore.
Enjoy!
source
Feedback if it works for you.

How to Root MyPhone A618 TV Duo

How to Root MyPhone A618 TV Duo
| On 07, Nov 2012
Do you want to root your MyPhone A618 TV Duo? If yes, then go ahead and read our rooting tutorial in rooting MyPhone A618. It is very easy and it will just require a few steps. However, as always, we will not take any liability if ever something goes wrong during the process. Rooting is not for the faint hearted so think about it over and over again before deciding to continue.
DISCLAIMER: NoypiGeeks will not be responsible for any damage that may possibly occur to your device in any part of the process although it is unlikely to happen if you’ll follow the instructions carefully. To know the benefits and disadvantages of rooting, click here. ROOT AT YOUR OWN RISK.
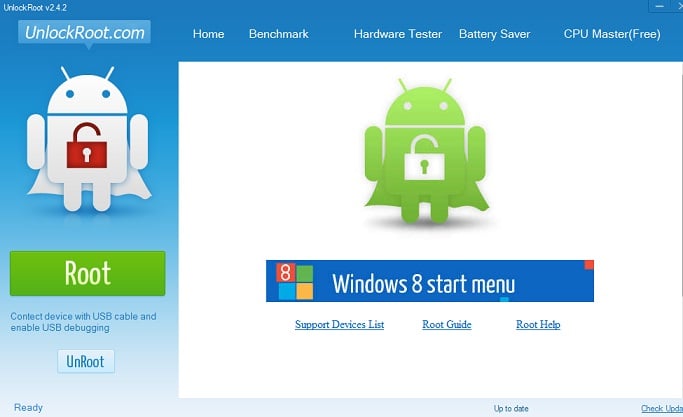
We will be using UnlockRoot for this rooting tutorial but before anything else, download it here. Alright, let’s start.
unlockroot
** Make sure you have your phone’s USB drivers are installed. It is automatically installed if you plug your device via USB.
1. Do this before plugging your device. Click Start > Run > regedit > HKEY_LOCAL_MACHINE > SOFTWARE > Microsoft >Windows > CurrentVersion.
2. Click on Device Path and then copy the current value on Notepad (we will restore it later). Now, clear it.
3. Install UnlockRoot.
4. After Installation, launch it and connect your MyPhone A618TV Duo using the microUSB cable (make sure you have enabled USB debugging in Settings).
5. Click ROOT! It will prompt you to install a battery saver but I opted out (install it as you wish).
6. Wait for the process to finish and your MyPhone A618 TV Duo will reboot.
7. Check if you have a SuperUser Icon on your App drawer.
8. Congratulations! You’re MyPhone A618 is now ROOTED!
9. Put the default value of Device Path back and your done.
How to root MyPhone A618rooting MyPhone A618
If you have any questions on how to root MyPhone A618, kindly post it on the comments section below and I’ll try to help.

How to Root MyPhone TS1 Duo

As I was passing by in some forums, I saw a thread on how to root MyPhone TS1 Duo. Rooting is always a dilemma when users buy the android products of our local mobile manufacturers because there were very little to no support for it unless there was a popular international counter part. But this time, a well-known method worked. So, the cheap android phone from MyPhone worth Php3,999 can now be rooted. Cool, right?
myphone ts1 duo
For the benefit of others who’s not aware, here’s the MyPhone TS1 specs:
  • Dual-SIM Touch Android Phone
  • 3.2″ 320×480 pixels TFT HVGA Resistive Touch Screen
  • Android 2.2 Froyo
  • Wi-fi, Wi-Fi hotspot
  • 2 MP Camera 1600×1200 pixels
  • Motion/Magnetic Sensor
  • MP3/MP4 Player/ Stereo FM Radio
  • Bluetooth/USB/3.5mm jack
  • GSM/EDGE Triband
  • Expandable Memory up to 8GB
Now, let’s proceed to the real thing- the process on how to root MyPhone TS1 Duo. This rooting method is the same when I made the tutorial on how to root Cherry Mobile Nova with Android 2.1 Eclair OS. So, I’ll just quote the steps here with a few minor changes.
[important]
DISCLAIMER: NoypiGeeks will not be responsible for any damage   that may possibly occur to your device in any part of the process although it is unlikely to happen if you’ll follow the instructions carefully. Root at your own risk.
[/important]
1. Make sure your battery level is above 80%. This is not required but I’m recommending it to lessen possible problems.
2. Download z4root. You can download it using your PC or phone it doesn’t matter just place it in your SD card.
3. Install the z4root app on your MyPhone.
4. Launch the app and click ROOT!
5. Wait for the whole process to finish.
6. Voila! You’ve successfully rooted your MyPhone TS1 Duo!

How to Root MyPhone A919 Duo

How to Root MyPhone A919 Duo
| On 23, Nov 2012
So you finally got the new MyPhone A919 Duo, huh? If you want to quickly find those cool tweaks and install them on your phone, then you have to root your MyPhone A919 Duo first. Most advanced mods require root access on the android phone so before you jump into the plunge, you have to learn how to root MyPhone A919 Duo.
IMPORTANT: NoypiGeeks.com will not be responsible for any possible damage that may happen to your device in case something goes wrong. ROOTING VOIDS YOUR PHONE’S WARRANTY. ROOT AT YOUR OWN RISK.
MyPhone-A919-Duo-Price
If you’ve already made up your mind and you want to proceed, then read on below to know how to root MyPhone A919 Duo. Let’s start.

Tutorial on rooting MyPhone A919 Duo

1. Download PDANET for Windows HERE.
2. Don’t connect your MyPhone A919 Duo on your computer yet. Follow the instructions on how to install PDANET and when asked on which phone are you using, choose “Other brands”.
3. In your phone, go to Settings > Developer Options > Check USB Debugging.
4. Wait for the installation of the phone’s drivers. It will prompt a message once it is finished.
5. Download the needed file through this link.
6. Unzip the file and double click on the “RUNME.BAT” file. The command prompt will appear and press “1″ and hit enter.
7. Wait for the command prompt to say that you have to restore your MyPhone A919 Duo. Go over your phone and hit “Restore my Data”. It will reboot and the command promopt will require you to press any key. Wait for the smartphone to turn on.
8. VOILA! You now have a rooted MyPhone A919 Duo.
Now that you’ve successfully rooted the MyPhone A919 Duo, your phone is now free of restrictions and you can now modify it in every way that you want. You have to be more careful, though, since you now have access to system files and one wrong move could possibly make your phone useless.
Credits to: Mon Barbeche

Install and root Jelly Bean on Myphone A919 aka Micromax A110: Easier Method


CREDIT GOES TO DROIDIZER

Install and root Jelly Bean on Micromax A110: Easier Method

Given the fact that it is generally more difficult for beginners to use SP Flash tools than to use Bin4ry’s script, this method to install and root Micromax A110 is surely easier than any previously posted methods. Paplu3, a xda member, has made a clockworkmod flashable zip file that can be easily flashed to get rooted Jelly Bean rom on your device. I shall explain how you can use that file to get Jelly Bean on your device. I decided to write this post after I saw that a few of our readers were not able to install clockworkmod on their device using Flash Tool after installing the Jelly Bean rom. This easier guide will help you do the job.

Notable Features of the CWM Flashable Jelly Bean ROM:
  • Stock Cynus T2 Jelly Bean ROM
  • Mobistel boot animation is changed to Micromax boot animation
  • Second sim problem fixed with Stock ROM v2’s modem.img
Before installing a new rom, it is always advised to backup your important stuff like contacts and apps. To backup your contacts, go to your Contacts, press menu, select import and export and finally select export to SD card. To import later on, select import from SD card. Titanium backup is everyone’s best bet to backup their apps along with data.

How To: Install Rooted Jelly Bean on Micromax A110

    micromax_a110_cwm_recovery
  1. Root your Micromax A110.
    Note 1.1: Obviously, you have to skip this step if you have already rooted your phone.
    Note 1.2: If you are a reading bug, read more about rooting.
  2. Install Clockworkmod Recovery using Mobile Uncle Tools.
    Note 2.1: Again, skip this step if you have already installed clockworkmod recovery on your device.
    Note 2.2: If you aren’t sure what clockworkmod recovery is, read this.
  3. Download this Zip file. This zip file is a clockworkmod flashable version of Cynus Stock T2’s stock Jelly Bean rom.
    Note: You don’t have to extract the file.
  4. Transfer the downloaded zip file to your phone’s SD card.
  5. Switch off your phone.
  6. Press Volume Up + Volume Down + Power button simultaneously till the screen lights up.
  7. A screen will ask you whether you want to go to Recovery or to Factory mode. Press Volume Up to go to Recovery mode.
  8. Select the Install Zip from SD card option and browse and select the zip file you downloaded in step 3.
    Note for first-time Clockworkmod users: Press Volume Up to Scroll Up, Volume Down to scroll Down and Power button to select the highlighted option.
  9. After the installation of the zip file completes, select “Wipe Data/ Factory Reset”.
  10. To calibrate your battery, you should go to Advanced >> Wipe Battery Stats.
  11. The flashing process is now completed. To exit clockworkmod recovery, select reboot phone now.
  12. Check if your phone is rooted.
This is it. You are done installing the ROM. As stated above, this rom is pre-rooted, you don’t need to root it again. Enjoy the bugless Jelly Bean on your A110. If you notice a deteriorated camera quality, read this.

How to Install ClockworkMod Recovery ported to Micromax A110


The one on the left is CWM Recovery on MMX A110 while the left one is,as the pic
says, the stock recovery that comes pre-installed on every device.
Micromax A110, the successor to the original Micromax Canvas A100, which has been garnering rave reviews from tech experts has set a foot ahead in development. It was rooted almost within a week of its launch and now it has received a port of the famous custom recovery ClockworkMod. Even the port of CWM for the Android device Spice Mi 500 took a longer time.I had promised you guys that I shall post the port as soon as it comes, and here I am. XDA member Subtrix has ported the recovery, I (and you should too) really thank him for that. I too would have tried porting the CWM recovery myself, but I couldn't get the stock recovery.img file from anyone. Subtrix extracted the stock recovery and ported it himself! (Though the compilation was done by Bruno Martins.)

The clockworkmod recovery, which happens to be the most popular custom recovery out there, will surely enable people to feel more secured because of the ability to take backups and do restores, along with easy installation of zip files. The custom recovery also allows flashing zip files not having signatures.

Rather than talking about the benfits of clockworkmod recovery (as I am going to post an article about that soon), I will hop onto the steps you need to follow in order to get a hold of the CWM recovery on your Micromax A110.

How to Install CWM on Micromax A110:

  1. Download the CWM Recovery. 
  2. Rename it to recovery.img and transfer it to your sdcard.
  3. Download MobileUncle MTK Tools from play store.
  4. Select the option "Recovery Update" from the app, and then when it ask for path, guide it to where you transferred the file to your sdcard.
  5. Your phone will reboot into the cwm recovery. Congrats for getting so far! Take a backup and reboot your device. (This one is optional, but should be obvious.)
  6. You can boot into the clockworkmod recovery (or the stock recovery, if you haven't flashed cwm till now) at any time by switching off your mobile, and then pressing and holding volume down, volume up and power button till the screen lights up. From there you will have the option to go the the recovery mode.

If anything goes wrong with your partition, or you don't feel like in love with Koushik Dutta for developing the ClockworkMod recovery, then you can use this stock recovery.img file to go back to stock again.
Don't get mislead (like our reader hellfrost) by the mobileuncle app snapshots I've attached above, these snapshots are from a different mobile and are attached because the app works the same way on every phone, and I hadn't had access to MMX A110, so installed the app on my phone and took the snapshots.

Myphone A919 aka Micromax A110 Custom Roms


ALL CREDITS GOES TO XDA-DEVELOPER

Micromax A110 users will always be grateful to Mobistel, the company that sells a A110 namesake as Cynus T2. I can hear some of you (especially those who haven't read the A110 Development stories) asking the question why Micromax users are thankful to a unknown (or little known) German company. The reason is because of the launch of an software update to Jelly Bean by Mobistel, they can now enjoy Jelly Bean exclusive stuff like Google Now, smarter notifications and a better default keyboard.

This is a compilation of all the unofficial Jelly Bean based custom ROMs available for our beloved Micromax A110. I am including the summary of features of the ROMs along with a bit of an overview, a link to their original development threads, so you can decide on the one you should try out. But believe you me, all of them are worth a shot, especially if you have a decent internet connection and some spare amount of time for testing out the ROMs. Because a great Android saint has said," Time and Internet are only two things you should have if you want to tinker with your Android to customize it fully to suit your needs."

Update: All jelly based custom roms are reportedly having poor camera quality, if you want to solve it, read this.

Jelly Bean Based ROMs for Micromax A110:

Mobistel Cynus T2 Official Jelly Bean ROM:

  • Overview: I was rather confused whether this rom should be included in a list of unofficial roms because this rom is official for Mobistel Cynus T2 users but unofficial for Micromax A110 users. It is a thumb rule that any rom not released by the device manufacturer themselves is said to be unofficial, but as Mobistel isn't the manufacturer of A110, and this post is targeted towards A110 users, therefore I decided to place it in here. The rom is quite stock like and you won't find most features you would generally look for in a custom rom. You will just get the Jelly Bean goodies that Google had in store for Android 4.1, nothing extra.
  • Features:
    • As Cynus T2 comes with a 12 MP camera, this rom will increase the resolution of the output files your camera will produce when you flash it on your Micromax A110.
    • Internal SD card size is about 1.05 GB while space available for apps installation is also around 1 GB.
    • For detailed information about this ROM, read this.
  • Download
  • Xda Thread
  • Snapshots:
    Cynus T2 JB Rom

JigarPattani's Jalebi ROM:

  • Overview:Jigarpattani is the same guy who cooked JMP ROM a few weeks back.This time, the Jalebi ROM is based on Jelly Bean, and the popularity of the rom can be gauged by the fact that this tom's support thread has received over 490 replies. The feature list is quite impressive too, see for yourself.
  • Features:
    • Baseband v5.p2
    • Beats Audio for enhanced graphics
    • Bravia Engine for better sound
    • Applications are movable to external SD card.
    • Pre-rooted
    • 60 Frames per Second frame rate is achievable
  • Download
  • Xda Thread
  • Snapshots:

Dr. Bhokali ROM:

  • Overview:
    Dr. Bhokali's ROM is pretty simple and sleek, but is super smooth too. I am running out of words for this rom as I haven't tested this one. (I don't have a A110 but test some stuff out on my friend's A110.)
  • Features:
    • Pre-rooted
    • Zipaligned and deodexed
    • Upto 60 fps frame rate
  • Download
  • Xda Thread

S.E.M.I. ROM:

  • Overview:
    Interesting naming to say the least, the rom itself is interesting.
  • Features:
    • Better Image and Video Quality
    • Touchwiz like UI
    • Pre-rooted
    • Cool backgrounds in settings and other menus
  • Download
  • Xda Thread
  • Snapshots:
    S.E.M.I. Rom for MMX A110

Ulefone Star N9776 ROM:

  • Overview:To flash this rom, you have to download the JB rom for Cynus T2, then replace the Ulefone's boot.img file with the boot.img present in Cynus T2's rom. Then, the file can be simply flashed via clockworkmod.
  • Snapshots:
    Ulefone N9776 Rom for A110
  • Download
  • Xda Thread

AMOI N820 Official Jelly Bean ROM:

  • Overview:
    I don't know anything about this rom, apart from the fact that it is the official rom for AMOI N820. Another thing I have known from the snapshots is that UI is heavily doped.
  • Download
  • Xda Thread
  • Snapshots:
    Amoi N820 Rom for MMX A110
These six ROMs provide you ample amount of Jelly Bean sweetness to choose from. If I skipped any rom, do report back in the comments. Here is the Micromax A110's Jelly Bean forum, do start a topic there if you want to ask anything or just to share a trick or two.

How To Root Myphone A919 aka Micromax A110 Canvas 2 ICS using Binary


Myphone A919 aka Micromax A110 Canvas 2 is a PowerFull Android Phone With all Major Updates In It. But Without Rooting This Phone, one cannot release its ultimate power…..So I thought to make some tweaks for Micromax A110 , But Without Rooting Its Not Possible..
So First I am Going to Give a Root Guide For Canvas 2……After that day by day I will arrange, Tweaks For This Phone To Increase its Performance & Speed….

Requirements To Root Micromax A110

How To Root Micromax A110 Canvas 2

1. First Of All Enable The Usb Debugging Option On Your Cell… (Setting > Developement > UsbDebugging)

2. Connect Your Device with Pc OR  Leaptop….

3. Change The Mode Of Your Device from USB Mass storage to Media Device.
(This can be done only after connecting your cell with pc)

4. Download The A110-Rooter From above link

5. Extract The zip In your Pc

6. Double Click On Runme.bat file (as shown in below pic)
 
7. A Command PromPt  will appear on your Screen with Black bg & green letter on it.

8. Now Follow The Onscreen Instruction to Start &  Type 1 & Press Enter.

9. While Doing This Your Device will reboot several Time…

10. Now In Command Prompt Window if a Green letter says “Have Fun”, then look bellow this post & click on the Share button to share this post. :)
Congrats Buddy your Micromax A110 Canvas 2 is Now Properly Rooted
 Still if you have any doubt on your mind that whether rooting properly done or not,then Download The RootChecker App From Market & Check It yourself..

Myphone A919 a.k.a. Micromax A110 Downloads

How to Upgrade Myphone A919 a.k.a. Micromax A110 Canvas 2 To Android 4.1.1 Jelly Bean

Yesterday, Micromax released Android 4.1.1 Jelly Bean upgrade for the A110 Canvas 2 but on the downside, the software update isn’t available over-the-air and the users need to go to a Micromax Service Center, where the update would be installed on their Canvas 2.
However, if you want to save yourself the trouble of running down to the service center, the official upgrade is also available on Micromax’s website as well as on XDA and if you know some tidbits of flashing a ROM, you can easily install the Jelly Bean upgrade on your Canvas 2.
What? Not too comfortable flashing the upgrade yourself? Well, don’t worry because we’re giving you a quick tutorial on how to install the upgrade on your Micromax A110 Canvas 2.

To upgrade your Canvas 2, here’s what you need: 

Once you have have downloaded the three files, extract them (preferably to your desktop for ease of access) and make sure that your Canvas 2 is TURNED-OFF and NOT CONNECTED to your computer.

Then, follow these simple steps to upgrade your Canvas 2:

  • Install the drivers for the Micromax A110 Canvas 2 on your computer.
  • Then, open the SP Flash Tools folder extracted from the Zip file and open Flash_Tool.exe

  • Once opened, click on Scatter-loading option, as can be seen in the image.

  • Now go to the Stock ROM folder which was extracted from the Zip file and then select the file named “MT6577_Android_scatter_emmc

  • As you click on ‘open’, the file will show up in the scatter loading file tab and then click on “Firmware -> Upgrade” button. The software will now go into phone detection mode. 

  • Make sure that your Canvas 2 is TURNED-OFF and then connect it to your computer.
  • SP Tools will detect your Canvas 2 and start the flashing process if everything is right. 
  • After completion, a green ring will appear on your computer’s screen indicating that the upgrade was successful.

  • Then, close the SP Tools, disconnect your Canvas 2 and turn it on.
Voila! Now you have Android Jelly Bean on your Canvas 2.