Sunday, May 26, 2013

How to Share Your Android Device’s Files over WiFi

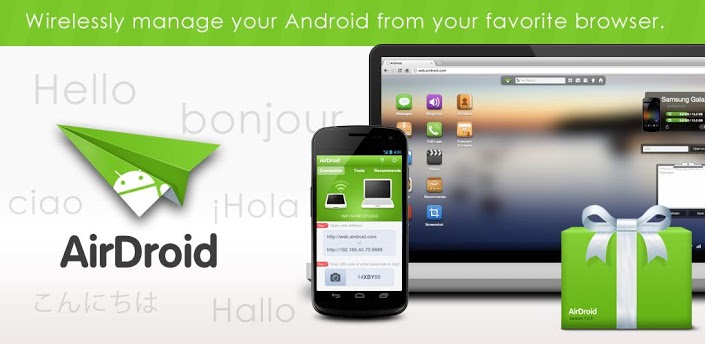
Share Android Device's Files over WiFi
The days are gone when you needed to connect your device to your PC using cables to transfer files as much convenient options have now become available. With the connectivity options like WiFi, you can transfer files fro and to your device without using cables at a faster transfer rate. You don’t need to buy any expensive accessory to do that, you just need an app and fortunately, the app’s available at free of cost. So, let’s see how you can share your device’s files over WiFi  using the app.

I. Before You Begin:

1. Both your PC and your device must be connected to the same WiFi network.

II. Downloading Required Files:

1. AirDroid (Google Play Link)

III. Sharing Your Android Device’s Files over WiFi:

1. Download and install the AirDroid app on your device.
2. Once installed, launch it from your App Drawer.
3. It’ll show a tour for the first time users, just skip it.
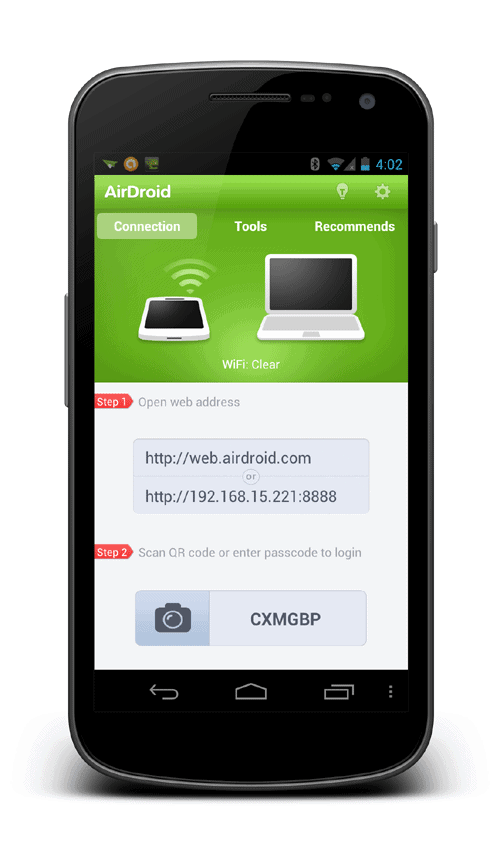
4. Now, you’ll see an IP address and a password in the app. Note them down.
AirDroid Screenshot
5. Open a Web Browser on your PC and type in the IP address you got in previous step.
6. You’ll then be asked to enter the password. Just input the password you got in step-4.
7. Hit the Enter button on your keyboard.
8. And you’re done!
Great! You’ll now be able to copy files from your device to your PC and vice versa. The transfer rate would be as fast as if you were copying files from one drive to another on your PC!
If this procedure helped you please thank/donate to the original developers here.
If you need help with this procedure, please ask in the comments below or in the forum.
This is part of our Android How To’s. We have how to’s on rooting, loading ROMs, and tons of other tips and tricks for your specific device or for Android devices in general! For all of our Android How To’s, head here.
Read more at http://theunlockr.com/2013/01/21/how-to-share-your-android-devices-files-over-wifi/#50ApLYG33IgYR6xb.99

How to Use Your Phone Overseas (Ultimate Guide)

Use Your Phone Overseas
Using your phone overseas can be as easy as just turning it on, but using your phone like that overseas will cost you more than your hotel costs most likely. If you want to use your mobile phone overseas, you can do so without incurring a ton of charges by following a few steps.
I. Download these Apps to Make Traveling Easier
There are a few apps that you should download before you leave the States that can make communicating easier once overseas.
1. WhatsApp – Go to your device’s app store and search for WhatsApp. Install it. Set it up by following the on screen setup process. WhatsApp is free for the first year and only $0.99/year after that. Worth it.
WhatsApp will allow you to send text messages to anyone else that has WhatsApp on their device for free using a data connection. Since data plans in most countries are a flat rate and text messaging rates to text people in other countries are ridiculous, this can be a huge saving right off the bat.
*You need to download WhatsApp BEFORE you leave your current country. This is because when you first install it, it has to verify your phone number using a text message and then it is always associated with that number. Doing this before leaving the country ensures that it associates your usual phone number with the account and not a temp number you might be using in the new country.
2. Skype – Go to your device’s app store and search for WhatsApp. Install it. Set it up by following the on screen setup process.
Skype’s big draw is that it allows you to do video calling with anyone else that has Skype on their device as well for free using a data connection. I wouldn’t recommend doing this on a mobile data plan on your device as it’ll eat up your data allotment quite quickly, it is great to use when you have a Wifi connection available.
3. Google Voice (US Only) – This isn’t quite for your phone but has to do with phone calls. On the computer you are planning to take overseas, make sure go to google.com/voice and sign up for a google voice account and gmail account. Choose a phone number from your area in the US (it only works for the US for now) and then open mail.google.com and login with your gmail account tied to the new Google Voice account. Then click the phone icon in the chat window to the left and dial a US number to make sure it works.
The big draw for this is it will allow you to call people back in the States from your computer for free. Also handy if you need to pretend you aren’t overseas as the number that will show up on their caller ID will be the US number you selected when signing up. Just keep those timezones in mind, calling at 3am might give away that you’re in Beijing.
*You need to download Google Voice BEFORE you leave the US, as the download is blocked in some countries (even though the download is blocked, using it in other countries should work fine).
II. Determine whether your phone is GSM/CDMA
In the States, we use two different cell phone technologies, GSM, which uses SIM cards, and CDMA, which does not. The general rule of thumb is if you are using any company besides T-Mobile or AT&T, then you are most likely using CDMA and do NOT have a SIM card. If you are using T-Mobile or AT&T then you DO have a SIM card.
Why does this matter? Well, most cell phone service providers outside of the States are GSM and so they use SIM cards. Unfortunately, if you have a CDMA phone and in a country with only GSM providers, you won’t be able to use your device, period.
There is only one exception to this, Verizon and Sprint now have some devices that even though they are CDMA they are also have an included SIM card slot just for use overseas. They usually label these devices as “World Phones”. If you have one of these devices then you can put a SIM card in them when you go overseas and be okay. Easiest way to figure out if you have one of these devices is to simply call your carrier and ask if your device is capable of using a GSM SIM card overseas.
III. Check the Frequency Compatibility
So now that you’ve figured out that your phone is GSM, there’s one more thing to figure out before you can ensure your phone will work when you get there: the frequencies.
Nowadays, most phones have all 4 frequencies used for voice and text messaging (850/900/1800/1900) so, for the most part, you shouldn’t have an issue going to any country with your device and using it as a phone (heading into a small country with a name you’ve never heard before might cause an issue but most modern countries will work just fine).
The issue comes in with 3G frequencies. Depending on the carrier these vary. AT&T in the States uses 1900mhz, T-Mobile uses 1700mhz, etc. So make sure to head to GSMArena.com or another similar site, search for your device, and take note of the frequency listed for 3G (and 4G if you have an LTE enabled device and want that to work as well). After that, head to our frequencies page for a list of carriers and their 3G/4G frequencies to see if they match your device. If they are, brilliant! If they aren’t you might want to purchase a phone that has that frequency built in instead or else just have slow internet.
IV. Get a SIM card from a Carrier in the Country You Are Visiting.
Before you leave, take a second to go online and do a little research on what phone companies are in the country you are visiting (and also which are the best/largest/fastest). This is easy to do by just Googling the name of the country and typing in “mobile phone companies” behind it or something similar.
Once you’ve done your homework and decided on a carrier, Google where their stores are before heading overseas. If you can find one in the airport you arrive in, youll be able to get a SIM card immediately and use Google Maps to then navigate your way to your hotel room. Imagine having to do this without Google Maps. Asking for directions, speaking to other human beings, scary I know.
V. Unlock Your Device
If you’ve found out that your device uses a SIM card and will work on the carrier you’ve chosen overseas the next step is to SIM unlock the device so it will accept the new SIM card hen you insert it.
If you have a device from a carrier (i.e. T-Moble, AT&T, Vodacom, etc.), then it is most likely SIM locked to that carrier. If you have a device you bought directly from the manufacturer or from Google (i.e. Nexus 4) then it is most likely unlocked already. If it is unlocked already, then no need to do anything, just skip this step and head to the next section. If it is locked, then you can unlock it in one of two ways.
1. You can simply ask the carrier to unlock it. Most carriers will do this for free so long as you’ve been in contract with them for more than 90 days (at least here in the States). All you have to do is call them and tell them you are heading overseas and want your SIM unlock code from them. If they give it to you, simply save it and put it in when prompted for it by the phone when you insert the foreign SIM card. If they don’t give it to you, head to the next option below.
2. If you cant get the unlock code from your carrier for free, then you can always purchase one. We have a supplier we use for these codes for our own devices that we can recommend. Head there, choose Products & Services, choose your device, and purchase an unlock code (they are the cheapest and most reliable we’ve found but feel free to Google your device name and the term unlock code behind it if you want to try and use another supplier).
Once you purchase it it’ll take up to 48 hours to get the code sent to you. Once you receive it, simply put in any unauthorized SIM card and it will prompt you for the code*. Once inputted, your device will be permanently unlocked and ready to accept a foreign SIM card.
*For iPhone users, there is no need to enter in a code. Simply wait for the email saying your device has been unlocked and plug it into iTunes. iTunes will let you know that your iPhone is now unlocked and you are good to go.
VI. Buy a Prepaid SIM card when you get overseas.
1. Hopefully, you’ve Googled where to find the carrier you planned to use before you set off and know where to go to get the SIM card (and if you were lucky, it was in the airport you arrive in).
Once in the store, you need to find out about their prepaid SIM only plans. I recommend getting a data plan (i.e. 1.5Gbs, 2Gbs, 3Gbs, etc.) and adding a little bit of talk time on top as well. If you’re like me things like Google Maps, Facebook, Yelp, web browsing, etc. will be used far more often than talking on the phone (also keep in mind that you can use WhatsApp for text messaging and Google Voice on your computer for calling).
VII. Setup the Internet Settings
1. Last thing you need to do is put in the new carrier’s internet settings. Soon as you put the SIM card in, you’ll be able to make calls and send texts but internet and MMS are a totally different ballgame. Each carrier has their own settings for your phone to be able to access the internet and send picture/video messaging. For our full list of internet settings, head here and write down the one you need for the country/carrier you’ll be using as you’ll have to input it during the next step.
Here’s how to add the correct internet settings for each of the major mobile operating systems:
Android (4.2.1)
  1. Pull down the notification shade.
  2. Select the button at the top right to be taken to the quick options menu.
  3. Select Settings at the top right.
  4. Select More.
  5. Select Mobile Networks.
  6. Select Access Point Names.
  7. Tap the three dots at the bottom right and select New APN.
  8. Enter the information for each field for the carrier you are using from our list of settings.
  9. When you’ve entered everything, tap the three dots in the bottom right corner and select Save.
  10. Now tap the empty dot to the right of the new APN to select it.
  11. Wait 2 mins and then try to access a website from your internet browser.
iPhone/iOS:
  1. Open Settings.
  2. Select General.
  3. Select Cellular.
  4. Select Cellular Data Network.
  5. Turn ON Mobile Data if it is off.
  6. Select APN.
  7. Enter the information for each field for the carrier you are using from our list of settings.
  8. Hit the Home button.
  9. Wait 2 mins and then try to access a website from your internet browser.
Windows Phone:
  1. Tap Settings.
  2. Select Cellular.
  3. Select Add Internet APN.
  4. Enter the information for each field for the carrier you are using from our list of settings.
  5. Wait 2 mins and then try to access a website from your internet browser.
Read more at http://theunlockr.com/2013/01/28/how-to-use-your-phone-overseas/#SarLGMj7iUolydo3.99

How to Get the Facebook Home on Any Android Device (Updated 04.16.13)

Facebook Home
You might have heard about Facebook’s new app, Facebook Home, that replaces the home screen on your Android device. This new app launched on April 12th in the Google Play store but is only currently available for a handful of devices. Thanks to some impatient developers, that exclusivity didn’t last long. You can now download and install on the Facebook Home app on any Android device. Here’s how.

I. Install the New Facebook APKs

1. Uninstall your current Facebook app and Facebook Messenger and Facebook Home if you already tried to install it and failed. (You can do this by going to Settings > Apps > find the apps and uninstall them one by one).
2. Download the three APK files from the links below and save them to your desktop.
Facebook Home (Updated 04.16.13)
Facebook Messenger (Updated 04.16.13)
Facebook App (Updated 04.16.13)
3. Plug your Android device in via USB cable.
4. Copy the three APK files over to the storage of your device.
5. Unplug the device.
6. Open any file browser on your Android device and locate the APK files. (If you don’t have a file browser, head to the Google Play store on your device and search for Astro File Browser and install that, then use that to locate the APK files).
7. Click each of the APK files to install them, one by one. To avoid issues, install the Facebook App first, open it and login. Then install the Messenger app, open it and login. Then, finally, install the Facebook Home app, open it, and login.
8. Once they are all installed, hit the home button and when asked which app to use select the Facebook home application (you can check the box to make it the default if you decide you want to keep it for now).
9. Enjoy exploring the new launcher and apps. To uninstall, simply go to Settings > Apps > Select them Facebook apps and hit uninstall on each of them, one by one.
If you have any issues and have a custom recovery (or a stock recovery that has these options) head to recovery and wipe cache/wipe dalvik cache and reboot.
If this procedure helped you, please head to the developer’s original thread and thank/donate to them!
Read more at http://theunlockr.com/2013/04/13/how-to-get-facebook-home-on-any-android-device/#3q1vDyHGMCUfZc2R.99

[PORT] [CWM] Micromax A116 CWM 6.0.1.2 + Root

Using Flash Tools to Flash CWM Recovery to A116

Quote:

Requirements:
CWM Rewcovery
Flash Tool
A computer
A Micromax A116 (obviously)


Steps To Follow:-

1. Install drivers for your phone using Micromax drivers.
2. Extract the Stock ROM folder and replace recovery.img with cwm recovery.
3. Extract and open the SP Flash Tools.
4. In SP Flash Tools, click on Scatter-Loading and the program will ask you the location of the scatter loading file for your device.
5. In the extracted folder of the stock rom, go to the folder named "S9201_MP_F4_B1_IN_MMX_0.16_flasher_user" and select the file "MT6589_Android_scatter_emmc" which is our scatter loading file.
Check only recovery.img, preloader and uncheck all others.
6. Switch off your phone (Remove the battery to make sure it is switched off).
7. In Flash Tool, go to Options and Click USB Mode so that it is enabled. Click options again and then go to DA Download All > Speed and finally select High Speed.
8. Click the Download option (present on the right of Firmware
> Upgrade option) and the flash tool will start looking for your phone.
9. Connect your phone now. The Flash Tool will start the flashing process, the progress of which can be viewed from a yellow progress bar at the bottom of the flash tool.
**Don't interrupt this process as it can potentially brick your device.
**Make sure no power interruption takes place. (Use a laptop to ensure this).
10. After the process completes, a green ring will appear on your device signalling that the process was successful.
11.Disconnect your phone.


CWM is tested working.

Changelog:

[6/3/13]
1. Fixed external memory backup issue
2. Center image is now of CWM


Root tutorial:-
1. Flash both these files through cwm

http://downloads.noshufou.netdna-cdn...arm-signed.zip
http://downloads.androidsu.com/super...arm-signed.zip


Credits:
Mahommad Abdul Sajid- Testing
Yuweng- Porting methods
Micromax A110- Original Recovery


Press Thanks button if I helped!!
Press THANKS if I helped you in any way

How to Unlock Bootloader on Sony Xperia Devices (Official Method)

Sony-xperia-bootloader-unlock
In order to discourage owners from messing with their devices, companies lock devices’ bootloaders most of the times.  But for more enterprising users like our readers, this is seen more as a hindrance than a failsafe to rooting and flashing custom ROMs/kernels.  Times have changed now and manufactuers are now waking up to the developer community’s contribution that has grown exponentially over the years, and are offering to unlock bootloaders safely.  One such company is Sony (previously Sony-Ericsson) and this guide below will show you how to unlock your bootloader if you own a relatively recent Xperia device.

I.  Before You Begin

1.  Unlocking your bootloader will void your warranty.  Sony is particular about this and so are we.  Make sure you realize what you are losing before you take the next step!
2.  You will be opting out of over-the-air updates when you unlock your bootloader.
3.  Back up anything you feel is important before you proceed.

II.  Can my Xperia device be Unlocked?

Sony has been adding devices to the unlockable bootloader list over time and if your handset is listed on this page under the Supported Phones section, your device’s bootloader can be unlocked!  Another way to check is:
1. Enter *#*#7378423#*#* on your phone dialer to access the service menu.
2.  Go to Service info > Configuration > Rooting Status.  Check if Bootloader unlock allowed says Yes in this section.
If you found Yes, then you are in luck and your bootloader can be unlocked!

III.  Unlocking the Bootloader

1.  Install the Android SDK.  Use our setup guide (until Step 4) to do this easily.
2.  Download the fastboot driver file from Sony.
3.  Extract the downloadinf.zip you downloaded to a folder on your desktop.  This folder will now contain a single file called android_winusb.inf; copy this file.
4.  Go to c:\android-sdk\extras\google\usb_driver and paste the copied file here.  If you are asked to overwrite an existing file of the same name, do so.
5.  Find your IMEI number and write it down somewhere accessible.  To find out your IMEI number, type in *#06# on your phone dialer.
6.  Go to Sony Mobile’s Unlocking Site.
7.  Click on the Yes, I’m sure button to begin the process.
8.  Tick both the checkboxes agreeing to Sony’s legal terms and click on the I accept button.
9.  You should now be at the Unlock request page.  Enter your name, email and your device’s IMEI number and click on Submit.
10.  Your unlock code should now be revealed.  Write/copy this down somewhere accessible.
11.  Power down your device.
12. Hold the Menu button (Xperia arc, Xperia arc S, Xperia neo, Xperia neo V, Xperia pro) or the Search button (Xperia Play) or the Volume up button (Xperia mini, Xperia mini pro, Xperia ray, Xperia active, Live with Walkman, Xperia S) and connect the device to your PC using the microUSB cable already provided.
13.  If you are asked to install drivers, point the driver installer to c:\android-sdk\extras\google\usb_driver.
14.  Open up a command prompt window and type in the following commands.  To open up a command prompt windows, hit the Windows key + R to open up the Run dialog box, type in cmd in the Open field and hit Enter.
cd C:\android-sdk\platform-tools
fastboot.exe -i 0x0fce getvar version
[You should get a response back, something like 0.3, which means your phone is connected and detected properly]
fastboot.exe -i 0x0fce oem unlock 0xKEY
[Replace the KEY in 0xKEY with the unlock code you obtained from the Sony website]
Your bootloader should now be successfully unlocked!
If you need help with this procedure, please ask in the comments below or in the forum.
This is part of our Android How To’s. We have how to’s on rooting, loading ROMs, and tons of other tips and tricks for your specific device or for Android devices in general! For all of our Android How To’s, head here.
Read more at http://theunlockr.com/2012/09/20/how-to-unlock-bootloader-on-xperia-devices-official-method/#lYLZxoeAfk10JUTP.99